English
 Español
 Português (BR)
 Deutsch
 Français
 Italiano
 Türkçe
 Bahasa Indonesia
 Русский
 日本語
日本語 한국어
한국어 Українська
 Tiếng Việt
 Polski
 Nederlands
 ไทย
ไทย Română
 简体中文
简体中文 繁體中文
繁體中文 العربية
 Български
 Filipino
 हिन्दी
 اردو
اردو বাংলা
বাংলাMake a Professional Profile Picture at Home (No Studio)
A phone, a window, and ten minutes: shoot a profile photo at home, swap the messy background for a clean backdrop, and export it for LinkedIn.
- profile-picture
- portrait
- tutorial
- personal-branding

Your profile picture is the most-viewed photo you own. It shows up in every email you send, every comment you leave, every job application, every "who viewed your profile" list. Recruiters, clients, and collaborators form a first impression from it in a fraction of a second — long before they read a word you've written.
The good news: you don't need a photographer or a studio to get a profile photo that looks professional. You need a phone, a window, and ten minutes of editing. Here's the full process.
What makes a profile photo look professional
Before taking a single shot, it helps to know what you're aiming for. Strong profile photos share a few traits:
- Your face is the subject — head and shoulders framing, with your face taking up roughly 50–60% of the frame. Full-body shots waste the tiny circle most platforms give you.
- Soft, even lighting — no harsh shadows across the face, no blown-out foreheads, no cave-dark eye sockets.
- A clean, non-distracting background — the viewer's eye should land on you, not on the bookshelf, the beach, or the person cropped out at your shoulder.
- Sharp focus and honest color — skin tones that look like skin, not like a filter.
- You, recently — a photo that actually resembles the person who shows up to the video call.
Most people's photos fail on the background and the lighting. Both are fixable — one at shoot time, one in editing.
Step 1: Take the shot (phone is fine)
Modern phone cameras are more than good enough. What matters is how you use one:

- Find a big window — stand facing it, one or two meters away. Window light is soft, flattering, and free. Avoid direct midday sun; an overcast day is actually ideal.
- Mind the camera height — lens at eye level or a touch above. Shooting from below is unflattering for everyone; shooting from far above looks like a 2009 social media pose.
- Get some distance — don't shoot at arm's length. Prop the phone up two meters away and use the timer, or have someone else take it. If your phone has a 2x or 3x lens, use it — portrait focal lengths keep facial proportions natural.
- Take many shots — dozens. Vary your angle slightly, relax your shoulders, breathe out before each one. The keeper is usually somewhere in the middle of the session, after the stiffness wears off.
- Ignore the background completely — this is the trick that makes home shoots easy. Any cluttered room works, because the background is about to disappear.
Step 2: Replace the background
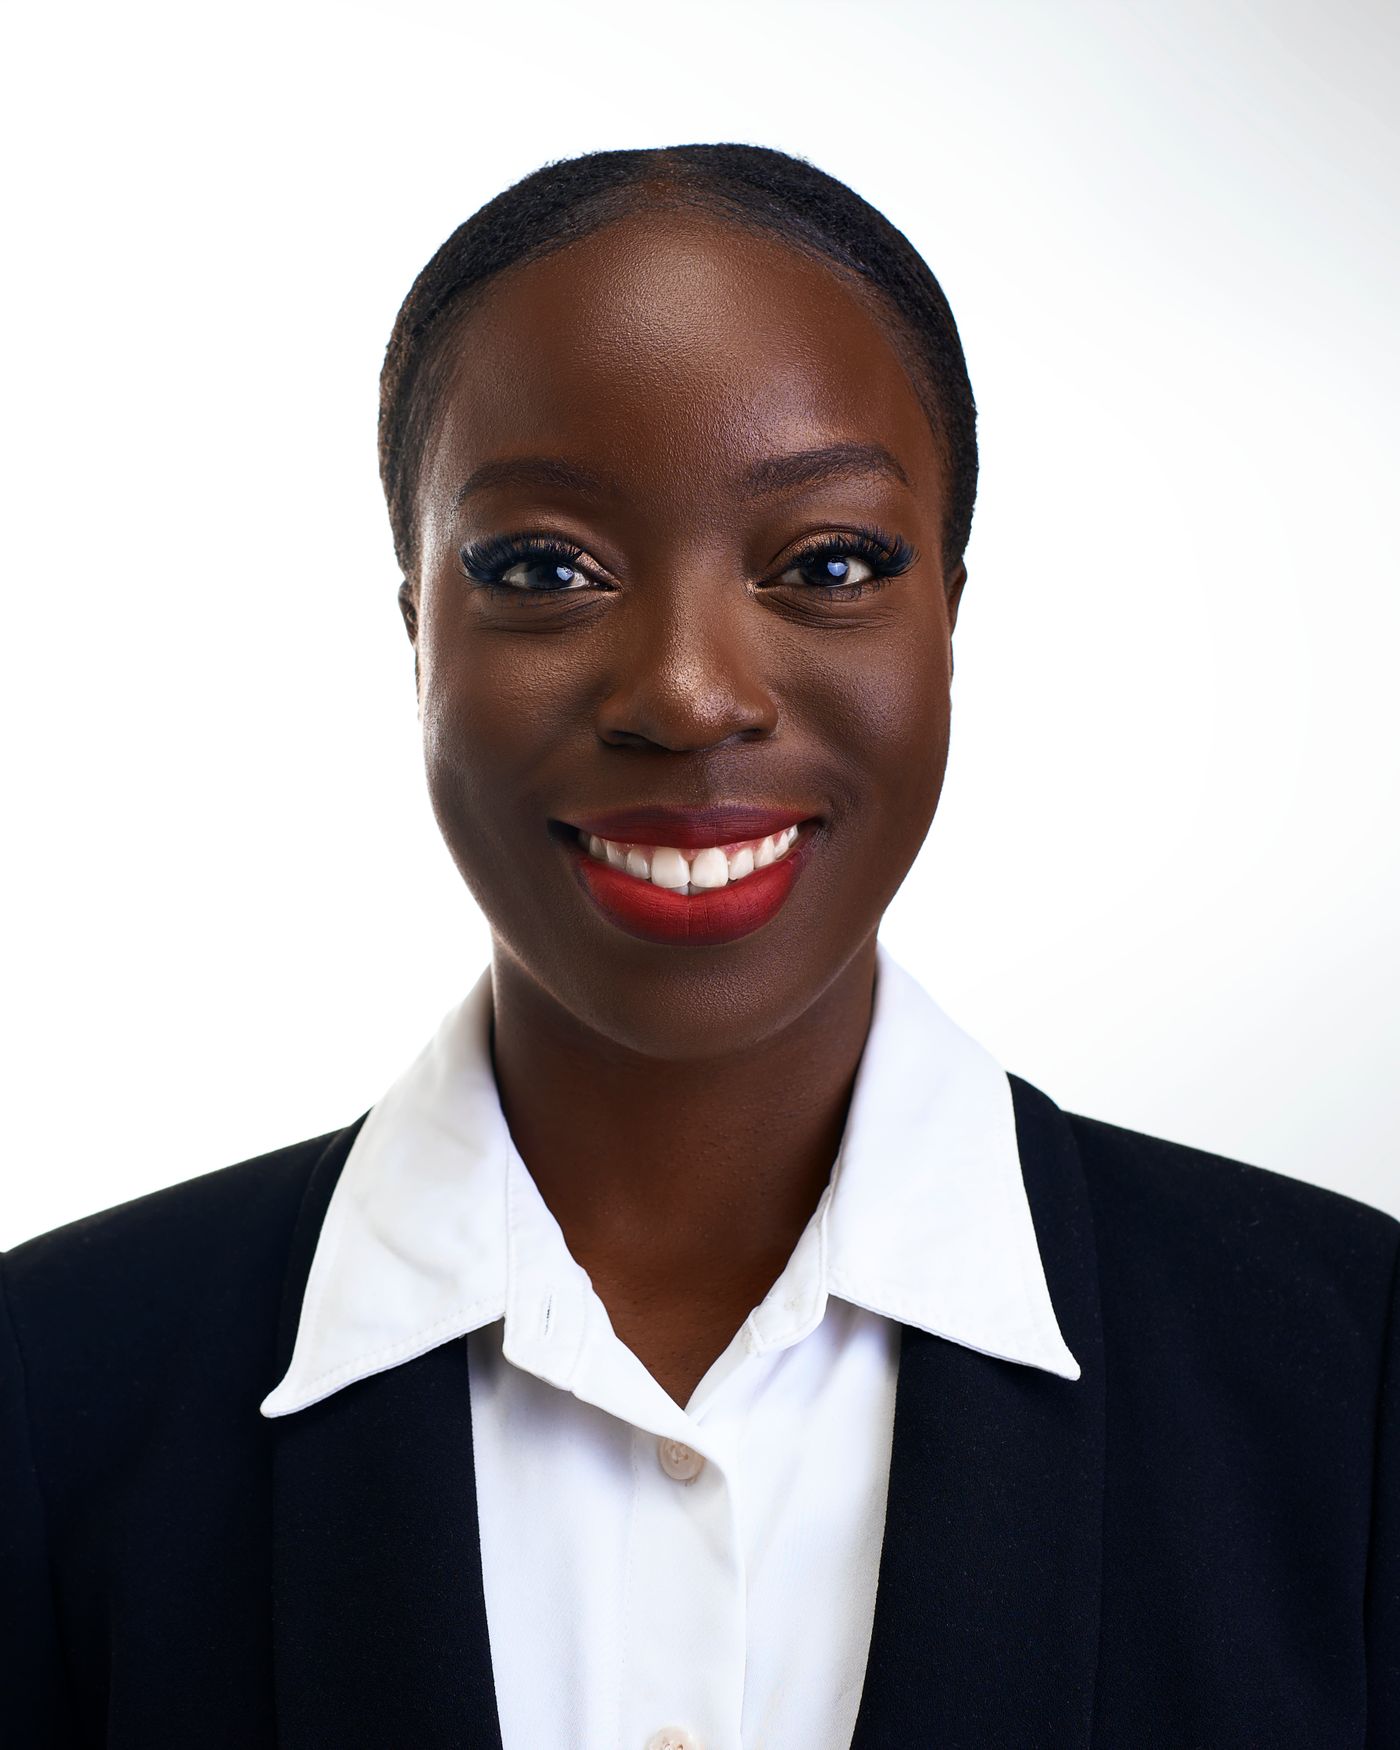
This is where a casual phone photo turns into a professional-looking portrait:
- Upload your best shot to remover.bg — the AI cuts you out cleanly in seconds, including the hard parts like flyaway hair, glasses, and collar edges.
- Choose a background that fits the platform:
- Solid neutral (light gray, off-white, soft blue) — the safe, corporate-friendly choice for LinkedIn and for job applications where a resume photo is expected. - A brand color — if you're a freelancer or founder, matching your profile backdrop to your brand color makes your whole online presence look deliberate. - Subtle gradient — adds a touch of studio feel without distraction.
- Keep it simple — resist busy scenes. The best profile backgrounds are ones nobody remembers.
A digitally replaced background has a side benefit: it's perfectly uniform, which reads as "studio shoot" to viewers even though you took the photo next to your fridge.
Step 3: Crop and export for each platform
Every platform displays profile photos small and usually round, so crop square and center your face:
- LinkedIn — upload at least 400×400 pixels; a 1000×1000 export gives you headroom.
- X, Instagram, GitHub, Slack — square uploads around 500–1000 pixels work everywhere.
- Check the round crop — most platforms mask your square image to a circle. Make sure the tops of your shoulders and your full head survive the corners being cut.
Export once at high resolution (PNG or high-quality JPEG) and reuse it everywhere. Consistency across platforms makes you more recognizable — the same face and backdrop on LinkedIn, GitHub, and email builds quiet familiarity with everyone you interact with.
Quick do's and don'ts
Do:
- Update your photo every couple of years, or after a major appearance change.
- Wear what you'd wear to meet a client — one notch more polished than your daily default.
- Look at the lens. Eye contact drives connection, even through a screen.
Don't:
- Crop yourself out of a group photo — the stray shoulder always shows.
- Over-filter. Smoothing artifacts are more noticeable in a small circle than you'd think.
- Use a photo where you're squinting into the sun, holding a drink, or wearing sunglasses. Approachable beats cool.
The bottom line
A professional profile picture is a lighting decision plus a background decision — and only one of them has to happen at shoot time. Face a window, take fifty relaxed shots, pick the best one, and swap the messy room behind you for a clean backdrop. Ten minutes, no studio, and every profile you own instantly looks more credible.
Need the same result for a whole company? The window-plus-backdrop method scales — here's how to get consistent team headshots without booking a studio.